How to Blow Dry Hair Straight: Complete Step-by-Step Guide
14 min readContents:
- Understanding Your Hair’s Blow-Drying Potential
- Essential Tools for Blow Drying Hair Straight
- The Blow Dryer: Ionic vs. Ceramic vs. Far Infrared
- Attachments: The Concentrator Nozzle Is Non-Negotiable
- Brushes: Paddle vs. Round, and Why It Matters
- Heat Protectant Products
- Pre-Blow-Drying Preparation
- The Microfibre Towel Step (Often Skipped, Rarely Regretted)
- Sectioning: The Real Secret to Professional Results
- Applying Heat Protectant and Styling Products
- The Blow-Drying Technique: Step-by-Step
- Heat and Speed Settings
- The Basic Blow-Drying Process
- Technique for Different Hair Textures
- Common Mistakes That Sabotage Your Results
- Rushing Through Sections
- Using Too Much Product
- Pointing the Dryer Upward or Sideways
- Blow Drying Soaking-Wet Hair
- Inadequate Sectioning
- Enhancing Results: Natural and Eco-Conscious Options
- Sustainable Product Choices
- Reducing Heat Exposure
- Recovery Strategies for Heat-Stressed Hair
- Blow Drying for Different Hair Lengths
- Short Hair (Chin-Length and Shorter)
- Medium Length (Shoulder to Bra-Strap)
- Long Hair (Past Bra-Strap)
- Frequency and Hair Health Considerations
- Troubleshooting Common Problems
- Frizz Returning Within Hours
- Hair Looking Greasy or Weighed Down
- Excessive Flyaways and Static
- Uneven Straightness (Some Parts Straight, Others Wavy)
- Frequently Asked Questions
- How often should I blow dry my hair straight?
- Can I blow dry my hair straight the day after I wash it?
- What’s the difference between blow drying straight and using a hair straightener?
- Will blow drying permanently straighten curly hair?
- Is it better to blow dry with wet or damp hair?
- What blow dryer temperature should I use for fine hair?
- Final Takeaway: Making It Habitual
Can you get genuinely straight hair from blow drying alone, or is that just a myth perpetuated by hairdressers? The answer depends entirely on your technique, your tools, and your hair’s natural texture. Many people waste 45 minutes a day battling frizz and waves because they’re using the wrong approach. The good news: anyone can learn this skill.
Understanding Your Hair’s Blow-Drying Potential
Not all hair behaves the same when blow dried. Your hair’s texture, density, and moisture content determine what’s realistic. Fine hair dries quickly but tangles easily. Thick, coarse hair takes longer but holds a straight style better. Curly or wavy hair requires more tension and heat to relax temporarily into straightness.
The science here matters. When hair is wet, hydrogen bonds between protein chains are broken. Heat and tension realign those bonds as they dry. This is why blow drying creates temporary straightness—not a permanent change like chemical treatments do. Once your hair gets wet again, those bonds reset and your natural texture returns. This temporary effect usually lasts 24–48 hours, depending on humidity and your hair’s porosity.
Your hair’s porosity—how easily it absorbs and releases moisture—affects how straight your blow-dried hair stays. Low-porosity hair (tightly sealed cuticles) resists moisture but also resists heat penetration. High-porosity hair (open cuticles) absorbs moisture quickly, which means it frizzes faster in humid conditions. Knowing your porosity helps you choose the right heat settings and products.
Essential Tools for Blow Drying Hair Straight
The right tools make the difference between a polished result and damaged, frizzy hair. Cheap equipment often causes more harm than benefit.
The Blow Dryer: Ionic vs. Ceramic vs. Far Infrared
Your blow dryer choice determines everything. Expect to spend £80–£200 for a quality tool that actually delivers results. Budget models (£20–£40) generate excessive heat that damages hair, take twice as long to dry, and frizz immediately after.
Ionic blow dryers emit negative ions that break water droplets into smaller particles, reducing frizz by up to 30 percent. They dry faster because of better moisture penetration. Ceramic-coated models heat evenly and reduce hot spots that damage hair. Far-infrared technology heats hair from within rather than just the surface, requiring lower temperatures overall. The best blow dryers combine all three technologies.
Wattage matters more than most people realise. Anything under 1600 watts will struggle with thick hair and take disproportionately longer. Aim for 1800–2000 watts for genuine salon performance. Higher wattage means more airflow and faster drying times, not just more heat.
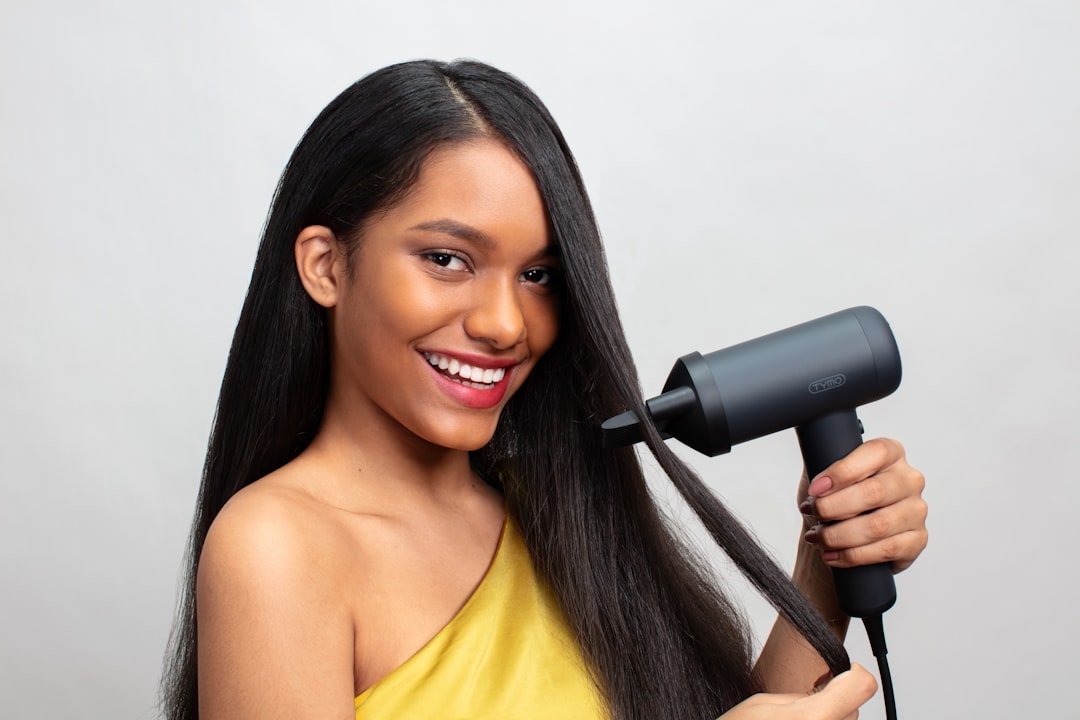
Attachments: The Concentrator Nozzle Is Non-Negotiable
The concentrator nozzle is the single most important attachment for blow drying straight. It narrows the airflow into a focused stream instead of scattering heat everywhere. This creates directional control and allows you to guide the hair in a straight line. Without it, you’re fighting against diffuse heat and lose 40 percent of your technique’s effectiveness.
Look for nozzles with a 2–3 inch opening. Narrower than 2 inches makes styling awkward; wider than 3 inches reduces precision. Some premium blow dryers come with replaceable ceramic nozzles (£15–£25 each) that last longer than standard plastic ones.
Brushes: Paddle vs. Round, and Why It Matters
Two main brushes suit blow-drying straight hair. Paddle brushes—flat, rectangular, with a grid of bristles—work best for medium to thick hair. They provide broad surface area and excellent tension. Round brushes work better for fine or medium hair and add subtle volume at the roots if that’s your goal. Vented brushes allow hot air to pass through, speeding drying time.
Bristle type affects results. Natural boar bristles smooth the hair cuticle and reduce static. Nylon bristles are more durable and easier to clean. Many hairdressers prefer hybrid brushes combining both. Expect to spend £25–£45 on a quality brush that won’t shed bristles onto your head.
Heat Protectant Products
A proper heat protectant spray creates a polymer barrier between your hair and direct heat. This isn’t optional—it genuinely reduces heat damage by 60–80 percent. Budget products (£5–£8) work reasonably well. Premium options (£15–£25) often include silicones that add shine as they protect.
Spray protectants work best applied to damp hair before blow drying. Leave-in conditioners also provide some protection, though they’re not a substitute for dedicated heat protectants. If your hair is fine or prone to greasiness, use a lightweight spray version. For thick or dry hair, creamy heat protectants offer more cushioning.
Pre-Blow-Drying Preparation
What happens before you turn on the dryer determines 50 percent of your success.
The Microfibre Towel Step (Often Skipped, Rarely Regretted)
Squeeze excess water out with a microfibre towel or old t-shirt—never rub or wring your hair. Cotton bath towels create friction and cause breakage. Microfibre towels (£3–£8 each) absorb water without damaging the cuticle. Wrap your hair in the towel for 5–10 minutes to remove up to 60 percent of moisture before blow drying. This cuts blow-drying time significantly and means less total heat exposure.
This step is particularly crucial if your hair is naturally curly or very thick. Pre-drying reduces the amount of heat work required, which means less damage and a smoother final result.
Sectioning: The Real Secret to Professional Results
Professionals section hair into 4–6 subsections using clips. Small sections allow even heat distribution and control. Large sections mean some hair dries before other hair is fully styled, creating inconsistent texture. Your sections should be roughly 2–3 inches wide.
A typical sectioning pattern: one section at the crown, two sections at the back, one section behind each ear, and one section at the front/fringe area. Secure each section with a clip (clips cost £1–£3, or use bobby pins). Release one section at a time as you work through drying.
Starting at the back and working upward prevents you from re-wetting or disturbing already-dried sections. Work the back sections first, sides second, front last. This method takes 20 minutes instead of 15, but results are significantly more polished.
Applying Heat Protectant and Styling Products
Apply heat protectant to damp hair before you start sectioning. Spray it lightly and evenly—you want coverage, not dripping wet sections. Some people prefer applying it section-by-section as they work through, which allows for more precise application.
A smoothing serum or anti-frizz cream can be applied after heat protectant, particularly to the mid-lengths and ends. These products (£12–£28) seal the cuticle and prevent moisture reabsorption that causes frizz. Apply sparingly—too much product weighs hair down and looks greasy. Start with a dime-sized amount for medium-length hair.
The Blow-Drying Technique: Step-by-Step
Heat and Speed Settings
Most blow dryers have three heat settings: low, medium, and high. High heat dries fastest but risks damage. Low heat protects hair but takes forever. The optimal setting for most people is medium to high heat with medium air speed. This combination provides enough heat for efficient drying without scorching.
Your final passes should be on a lower heat setting to seal the cuticle and reduce frizz. This “finishing phase” (the last 2–3 minutes) uses low heat and medium airflow, running the concentrator nozzle downward along each section.
The Basic Blow-Drying Process
Start with one sectioned area. Position the concentrator nozzle 4–6 inches from the roots, pointing downward. This distance is crucial: too close risks heat damage, too far away and you lose heat penetration. Turn on medium-high heat and begin drying the roots with the brush positioned underneath the hair for subtle volume.
Once roots are 70 percent dry, begin smoothing the length. Use your brush to gently pull the hair taut while the blow dryer follows behind, directing heat downward along the hair shaft. The direction matters enormously—always move heat down the cuticle, never upward or sideways. Upward heat direction roughens the cuticle and causes frizz.
Work in 2–3 inch vertical sections within each clipped area. Your paddle brush should be moving consistently downward, with the blow dryer concentrator positioned just above or alongside the brush. Your hair should feel warm but not hot to the touch at any point.
Once each section is about 90 percent dry (still slightly damp), switch to low heat. Run the brush through with low heat for the final pass, directing airflow downward. This seals the cuticle and sets your straightness. The entire process for one section takes about 3–5 minutes depending on thickness and length.
Technique for Different Hair Textures
Fine hair requires less heat and more speed. Use medium heat, higher airflow, and move through sections quickly. Don’t hold the brush stationary—keep it moving to avoid heat damage. Consider using a round brush instead of a paddle brush, as fine hair tangles less with round brushes.
Medium-thickness hair is the easiest to work with. Use medium-high heat, medium airflow, and standard technique described above. Most people achieve their best results with medium-thickness hair.
Thick or coarse hair needs higher heat and lower airflow speed. This allows heat to penetrate deeply without drying the surface too quickly. You may need to make multiple passes. Use a paddle brush for better control and tension. Work smaller sections (1.5–2 inches instead of 2–3 inches) to ensure every strand gets properly straightened.
Curly hair requires more aggressive straightening technique. Apply heat protectant generously. Use high heat and aim for more tension from the brush—you’re fighting against the curl pattern. Consider pre-straightening with a heat protectant cream before blow drying. You may need to make two passes per section for genuine straightness.
Common Mistakes That Sabotage Your Results
Even with good technique, certain habits undermine everything.
Rushing Through Sections
If you move too quickly, you’re not giving heat time to dry the hair properly. The result: hair that looks half-dry and frizzy immediately after. Slow down. Each section should take 3–5 minutes. If you’re consistently finishing in under 12 minutes total, you’re working too fast.
Using Too Much Product
Excess heat protectant, serum, or styling product coats the hair and prevents proper drying. This creates the “wet-looking” effect that makes straight-blown hair look greasy rather than polished. Use less than you think necessary. You can always add more, but removing product means starting over.
Pointing the Dryer Upward or Sideways
Directionality is everything. Heat pointing upward separates cuticles and causes frizz. Heat pointing sideways creates inconsistent drying. Always direct airflow downward along the hair shaft, working with the cuticle, not against it.
Blow Drying Soaking-Wet Hair
This is the single biggest time-waster. Water-heavy hair takes twice as long to dry. Use that microfibre towel for 10 minutes first. You’ll actually finish faster and expose hair to less total heat.
Inadequate Sectioning
Working with hair in two or three massive sections feels faster but produces uneven results. Some parts will be half-dry while you’re finishing others. Stick with 4–6 sections. It adds 5 minutes but makes the difference between “I tried to blow dry” and “I actually blow-dried my hair straight.”
Enhancing Results: Natural and Eco-Conscious Options
You can achieve excellent blow-dried straightness without relying entirely on heavy products or excessive heat.
Sustainable Product Choices
Solid bar heat protectants (£8–£15) eliminate plastic waste compared to spray bottles. They work just as well and last longer. Some brands use certified sustainable ingredients and minimal packaging. Rice water rinses applied before blow drying add shine naturally without product buildup. This zero-waste alternative costs essentially nothing and genuinely works.
Reducing Heat Exposure
Air-drying partway before blow drying reduces total heat exposure. Let hair air-dry 40–50 percent (takes about 20–30 minutes depending on thickness), then blow dry the remaining moisture. This hybrid approach produces equally straight results with less heat damage and lower energy consumption.
Lower heat settings combined with patience actually work better than maximum heat rushing. Using medium heat instead of high heat adds only 5–8 minutes but noticeably reduces damage. Think of it as an investment in hair health over the next few months.
Recovery Strategies for Heat-Stressed Hair
If you blow-dry frequently (4+ times weekly), your hair needs active recovery. Weekly deep conditioning treatments (£6–£16) restore moisture and protein. Protein masks are particularly effective after heat damage, rebuilding structural integrity. Monthly professional treatments (£30–£60) at a salon provide intensive repair that home products can’t match.
Blow Drying for Different Hair Lengths
Short Hair (Chin-Length and Shorter)
Short hair dries fastest—usually 8–12 minutes total. Use high heat to compensate for less surface area. Work in smaller sections to ensure even straightness throughout. The challenge is volume at the roots; use a round brush and lift sections upward while drying to create body.
Medium Length (Shoulder to Bra-Strap)
This length is ideal for straightening. Long enough to show clear results but short enough to dry efficiently in 15–20 minutes. Use standard technique with paddle brush. You have more styling flexibility here than with very short or very long hair.
Long Hair (Past Bra-Strap)
Long hair takes 25–40 minutes depending on thickness. Divide into more sections (6–8 instead of 4–6) to manage length. Start at the nape and work systematically upward. The weight of long hair helps straightness hold longer, but total drying time increases significantly. Consider whether blow drying is practical daily for your lifestyle, or whether styling it 3–4 times weekly is more realistic.
Frequency and Hair Health Considerations
Blow drying hair straight daily is possible but not ideal for most hair types. Even with excellent technique and protection, daily heat exposure accumulates damage over weeks and months.
A sustainable routine looks like: blow-dry 2–3 times weekly for straightness, air-dry or use other styling methods the remaining days. This balances aesthetic results with hair health. If your job requires daily styled hair, alternate between blow-drying straight one day and using other techniques (braid waves, heat-free styling, etc.) the next.
Monthly professional treatments (£35–£55) combined with weekly home deep conditioning genuinely prevent heat damage from accumulating. This costs roughly £10–£15 monthly for professional care, plus £15–£30 monthly for quality home products. Many people find this investment worthwhile compared to replacing damaged hair.
Troubleshooting Common Problems
Frizz Returning Within Hours
The cause is usually incomplete drying or inadequate heat-protective products. Ensure your final passes are on low heat to properly seal cuticles. Check humidity in your environment—frizz appears much faster in humid conditions. Apply serum or anti-frizz cream to ends before blow drying. If frizz persists, your heat protectant spray may be insufficient; try a heavier product or apply more generously.
Hair Looking Greasy or Weighed Down
You’re using too much product. Cut your amount by 50 percent on your next attempt. Fine hair rarely needs serum or heavy conditioning products during blow drying. Start with heat protectant spray only, then add conditioning products only to the ends, not the roots and mid-lengths.
Excessive Flyaways and Static
This indicates over-drying or cuticles left open. Use lower heat on your final pass. Apply a smoothing serum specifically formulated for flyaways (usually silicon-based, £10–£18). Some people finish with one or two manual passes using a cool shot on the blow dryer, which shocks cuticles closed and reduces static electricity.
Uneven Straightness (Some Parts Straight, Others Wavy)
You’re likely using inconsistent technique or skipping sections. Return to strict sectioning with clips. Ensure you’re making multiple passes per section rather than just one. Use consistent brush tension and heat direction throughout. If some sections naturally resist straightness, apply extra heat protectant to those areas before blow drying and work them longer.
Frequently Asked Questions
How often should I blow dry my hair straight?
Two to three times weekly is sustainable for most people. Daily blow drying is possible with excellent technique and products, but risks cumulative damage. If you blow dry daily, use lower heat settings and invest in professional monthly treatments to counteract damage.
Can I blow dry my hair straight the day after I wash it?
Yes. Second-day hair actually blow dries more easily because it’s less saturated with water. However, product buildup from the previous day can interfere. If you blow dry frequently, use a lightweight dry shampoo or clarifying spray before blow drying to remove buildup without full shampooing.
What’s the difference between blow drying straight and using a hair straightener?
Blow drying straightens hair through directed heat and tension, creating temporary straightness that lasts 24–48 hours. Flat irons use direct metal-to-hair heat at much higher temperatures, creating more pronounced straightness that typically lasts longer but risks more damage in a single session. Blow drying is gentler for frequent use; straighteners are better for occasional use requiring maximum hold.
Will blow drying permanently straighten curly hair?
No. Blow drying creates temporary straightness by realigning hydrogen bonds between proteins. This effect lasts until hair gets wet again or humidity causes re-curling. For permanent straightening, you need chemical treatments like keratin treatments or relaxers. Blow drying is a styling tool, not a permanent alteration.
Is it better to blow dry with wet or damp hair?
Damp hair (pre-dried with a towel to 40–50 percent moisture) produces better results than soaking-wet hair. Starting with completely wet hair takes twice as long and exposes hair to more total heat. Completely air-dry hair below 20 percent moisture is harder to straighten because it’s lost malleability. Aim for damp—cool to the touch but clearly still wet.
What blow dryer temperature should I use for fine hair?
Medium heat with high airflow works best for fine hair. High heat risks damage because fine hair has less structure to withstand extreme temperatures. The combination of moderate heat and strong airflow dries quickly without overheating delicate strands. Always use high-speed airflow with lower heat for fine hair rather than lower-speed airflow with higher heat.
Final Takeaway: Making It Habitual
Blow drying hair straight becomes effortless once technique becomes automatic. Your first attempts will take 25–30 minutes and feel awkward. By your tenth attempt, you’ll finish in 18 minutes without thinking about steps. By your twentieth attempt, you’re genuinely skilled.
Invest in proper tools now. A £150 blow dryer and £30 brush are not luxuries—they’re the actual foundation of success. Cheap tools don’t deliver results, period. The product investment (heat protectant, serum, deep conditioning treatments) amounts to £15–£30 monthly, a reasonable investment for styling that actually works.
Your hair will visibly improve over 2–3 months of consistent, proper blow drying. Cuticles become more aligned, breakage reduces, and straightness holds longer. This isn’t magic—it’s the result of reduced friction, proper heat protection, and correct technique applied consistently.
Start with the basics: microfibre towel, sectioning, concentrator nozzle, downward heat direction. Master these fundamentals before worrying about premium products or advanced techniques. Everything else builds from this foundation.